|
|
| Web Invoice Self Help | |
| Browse through the navigation panel for the information you are interested in. | ||||||

|
|

|
|
|||

|
||||||

| Step | Action |
| 1 | Go to Intel Web Invoice. |
| 2 | Click Create New Invoice link. |
| Result: The Create New Invoice screen will be displayed. | |
| 3 |
Enter PO number.
For example, 4200103597.
|
| Note: You must enter the entire PO number in the PO field for Intel Web Invoice to retrieve the requested information and in order to continue. | |
| 4 | Click Create button. |
| Result: The invoice for PO number entered will be created. | |
Notes:
|
|
| 5 |
Update the mandatory fields,
|
| 6 | Click Review Invoice button. |
| Result: The Review Invoice screen will be displayed. | |
| Note: The errors and missing fields will be notified in red. | |
| 7 |
Click Submit Invoice button.
OR, Click Edit Invoice button for amendment. |
| Result: The TAX Invoice Confirmation screen will be displayed. | |
Notes:
|
| Step | Action |
| 1 | Go to Intel Web Invoice. |
| 2 | Click Create New Invoice link. |
| Result: The Create New Invoice screen will be displayed. | |
| 3 |
Enter PO number.
For example, 4200103597.
|
| Note:You need to modify your profile setting in order to view more search results. | |
| 4 |
Click Add PO to Profile button.
|
Notes:
|
|
Note
|
|
| 5 |
Click Create button again to view the newly added PO result.
|
| Step | Action |
| 1 | Go to Intel Web PO. |
| 2 |
Enter PO number.
For example, 4200103597.
|
| 2 | Click Search button. |
| Result: The PO record will be generated. | |
| 4 |
Click PO number.
|
Results:
|
|
Notes:
|
| Step | Action |
| 1 | Go to Intel Web Invoice. |
| 2 | Click Create New Invoice link. |
| Result: The Create New Invoice screen will be displayed. | |
| 3 |
Enter PO number. For example, 4200103597.
|
| Note: You must enter the entire PO number in the PO field for Intel Web Invoice to retrieve the requested information and in order to continue. | |
| 4 | Click Create button. |
| Result: The invoice for PO number entered will be created. | |
Notes:
|
|
| 5 |
Update the mandatory fields,
|
| 6 | Click Review Invoice button. |
| Result: The Review Invoice screen will be displayed. | |
| Notes: The errors and missing fields will be notified in red. | |
| 7 |
Click Submit Invoice button.
OR, Click Edit Invoice button for amendment. |
| Result: The TAX Invoice Confirmation screen will be displayed. | |
Notes: The errors and missing fields will be notified in red.
|
| Step | Action |
| 1 | Go to Intel Web Invoice. |
| 2 | Click Create New Invoice link. |
| Result: The Create New Invoice screen will be displayed. | |
| 3 |
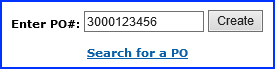
Enter PO Number. For example, 3000123456.
|
| Note: You must enter the entire PO number in the PO field for Intel Web Invoice to retrieve the requested information and in order to continue. | |
| 4 | Click Create button. |
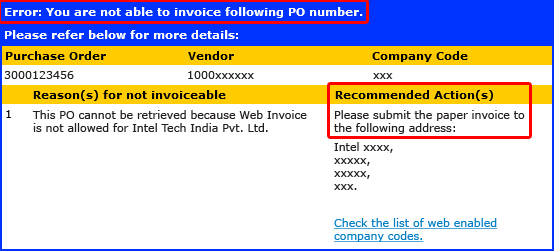
|
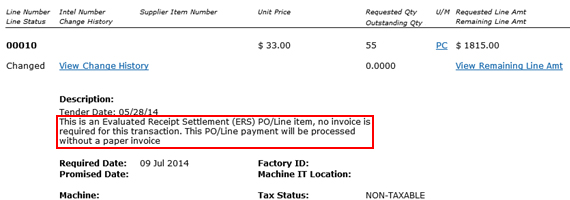
Result: An error message might be displayed on screen.
|
|
Notes:
|
| Step | Action |
| 1 | Go to Intel Web Invoice. |
| 2 |
Click Create New Invoice link.
Result: The Create New Invoice screen will be displayed. |
| 3 |
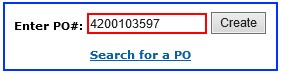
Enter PO number. For example, 4200103597
Note: You must enter the entire PO number in the PO field for Intel Web Invoice to retrieve the requested information and in order to continue. |
| 4 |
Click Create button. Results: The invoice for PO number entered will be created. Notes:
|
| 5 |
Update the mandatory fields:
|
| 6 |
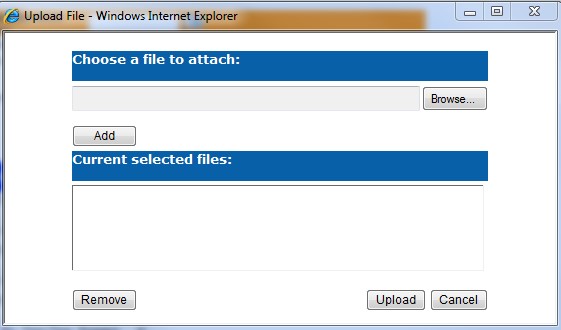
To attach a document: Click  Result: The Upload File screen will be displayed.
Click Browse button and select the document that need to be uploaded. Note: Only .pdf .doc .docx .jpg .jpeg .xls .xlsx .csv file format allow. Max file size is 25 MB. |
| 7 |
Click Add button. Then Click Upload button. |
| 8 | Select PO Line. |
| 9 |
Click Review Invoice button. Result: The Review Invoice screen will be displayed. Note: The errors and missing fields will be notified in red. |
| 10 | Click Submit Invoice button. |